
Guides · Finances
Set up Finances, step by step.
From an empty module to a month you can read at a glance. Seven steps, and you will know where your money is going.
How this guide works. Every step shows a screen from the app. What you need right now is lit and numbered, everything else is dimmed. Follow the numbers in the list beside it, and you are set.
Step 1 of 7
This is what your empty Finances dashboard should look like.
Nothing to read yet, and that is exactly right. Every card on this page fills itself from what you add in the next steps. Before we start, get your bearings. The bar at the very top is the same on every page of PDA, so we will leave it aside.
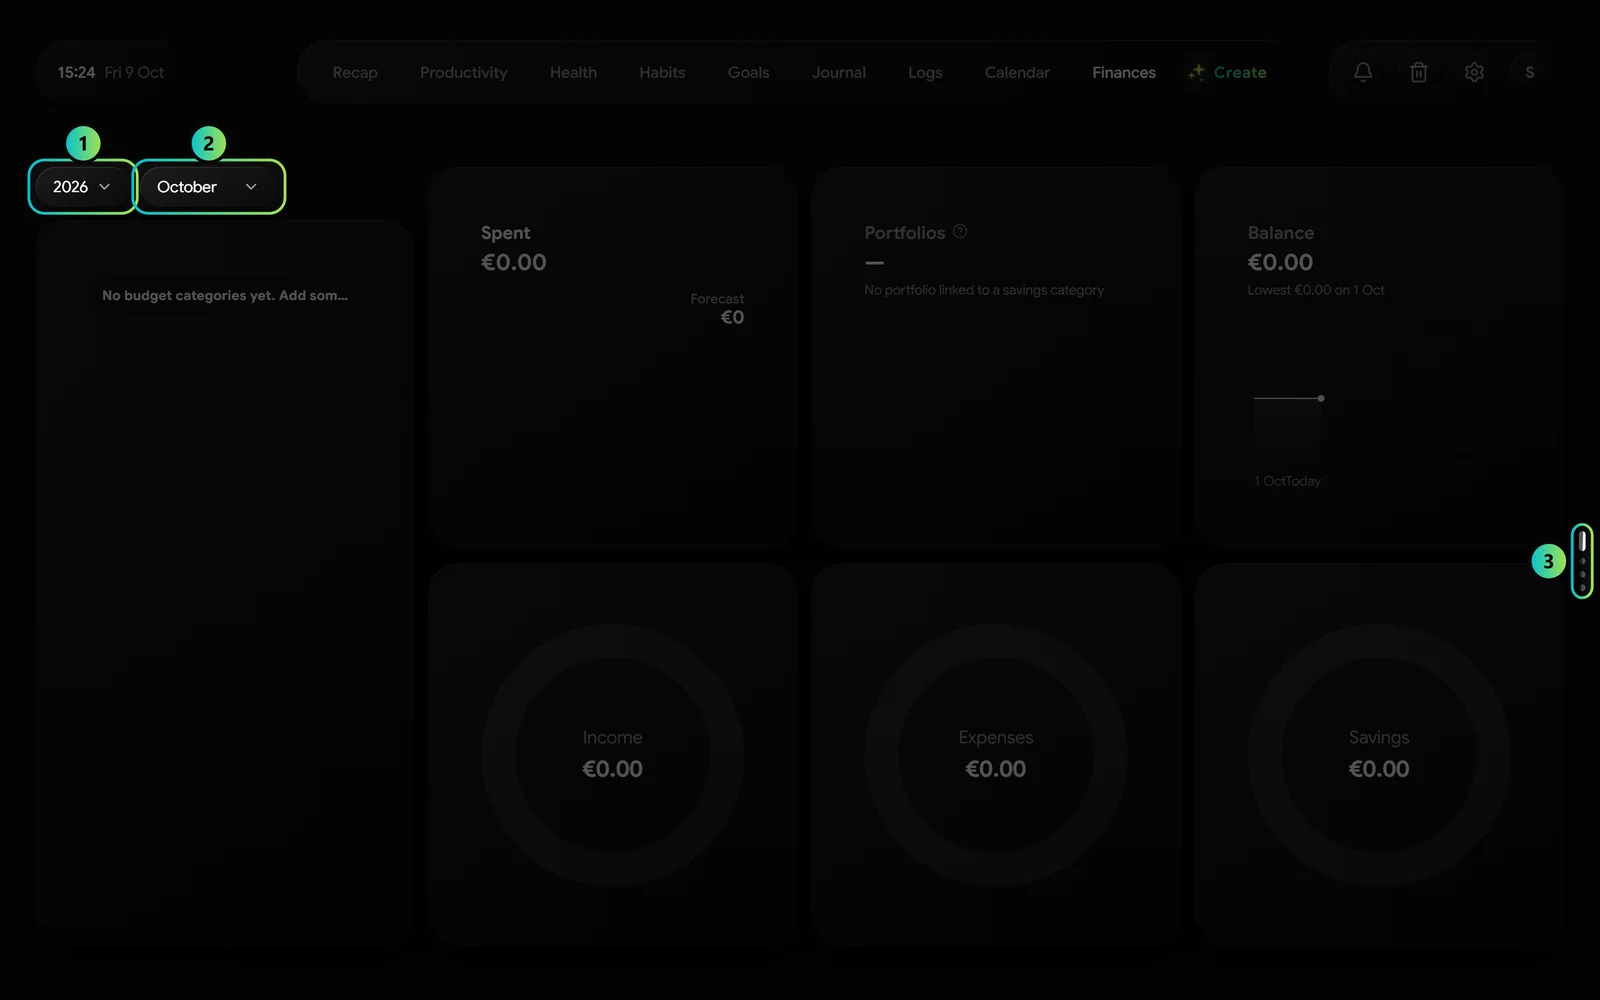
- YearThe year you are looking at. Budgets and charts follow it.
- MonthThe month you are looking at, or the whole year at once.
- The four pagesFinances has four pages: Overview, Transactions, Budget Planning and Trends. Scroll with your mouse wheel to move between them, or click a dot to jump. Head to Budget Planning, the third dot.
Step 2 of 7
Your plan starts on Budget Planning.
Three buttons are all it takes to give your money a structure. Begin on the right, with + Add Category. The other two come later.
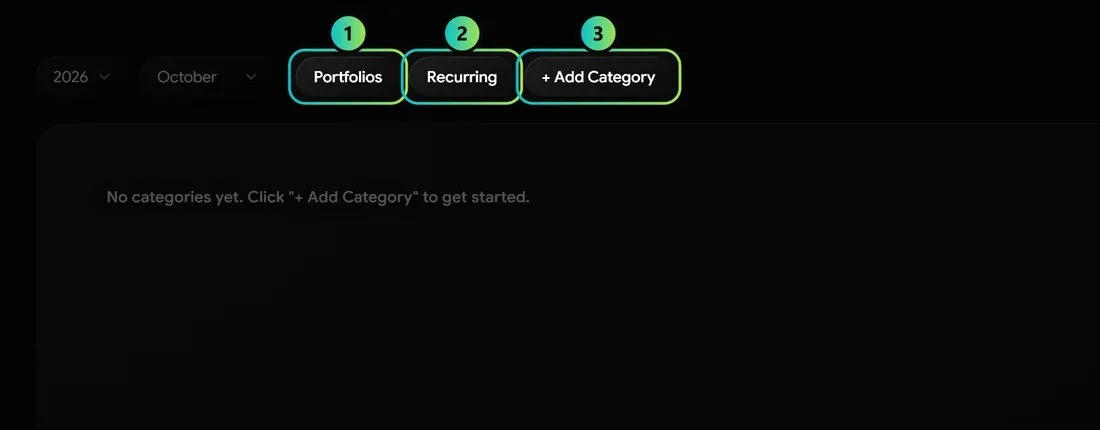
- PortfoliosSavings and investments you want to watch grow. Optional, you can add them any time.
- RecurringEverything that comes back every month or year: rent, subscriptions, insurance. That is step 5.
- + Add CategoryStart here. The buckets your money goes into: your salary, groceries, dining out, an emergency fund.
Step 3 of 7
Create your first category.
Start with what you spend on most. Groceries is a good first one. Click + Add Category and fill in three things.
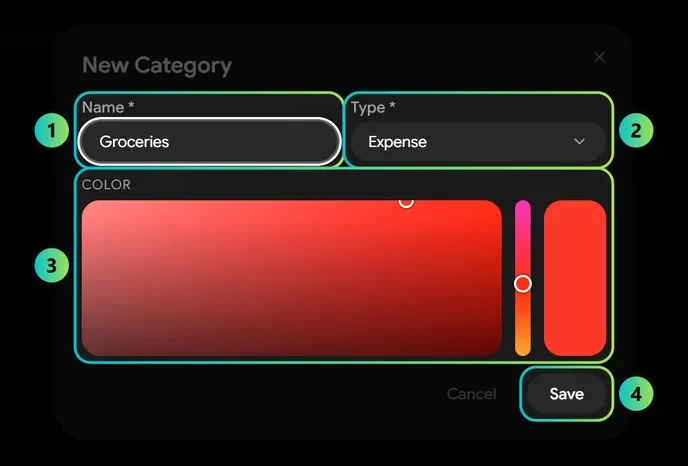
- NameCall it what you would call it out loud.
- TypeIncome, Expense or Savings. It decides where the category shows up and how it counts.
- ColourPick one you will recognise at a glance. The charts use it.
- SaveDone. Now add the rest the same way: your salary as Income, an emergency fund as Savings, and two or three more expenses.
Tip. Rent does not need a category. Add it under Recurring in step 5, and it books itself into Fixed Costs.
Step 4 of 7
Give every category a budget.
A budget is simply what you plan for a category in a month. Every category now has a row with twelve months. Click a cell and type the amount.
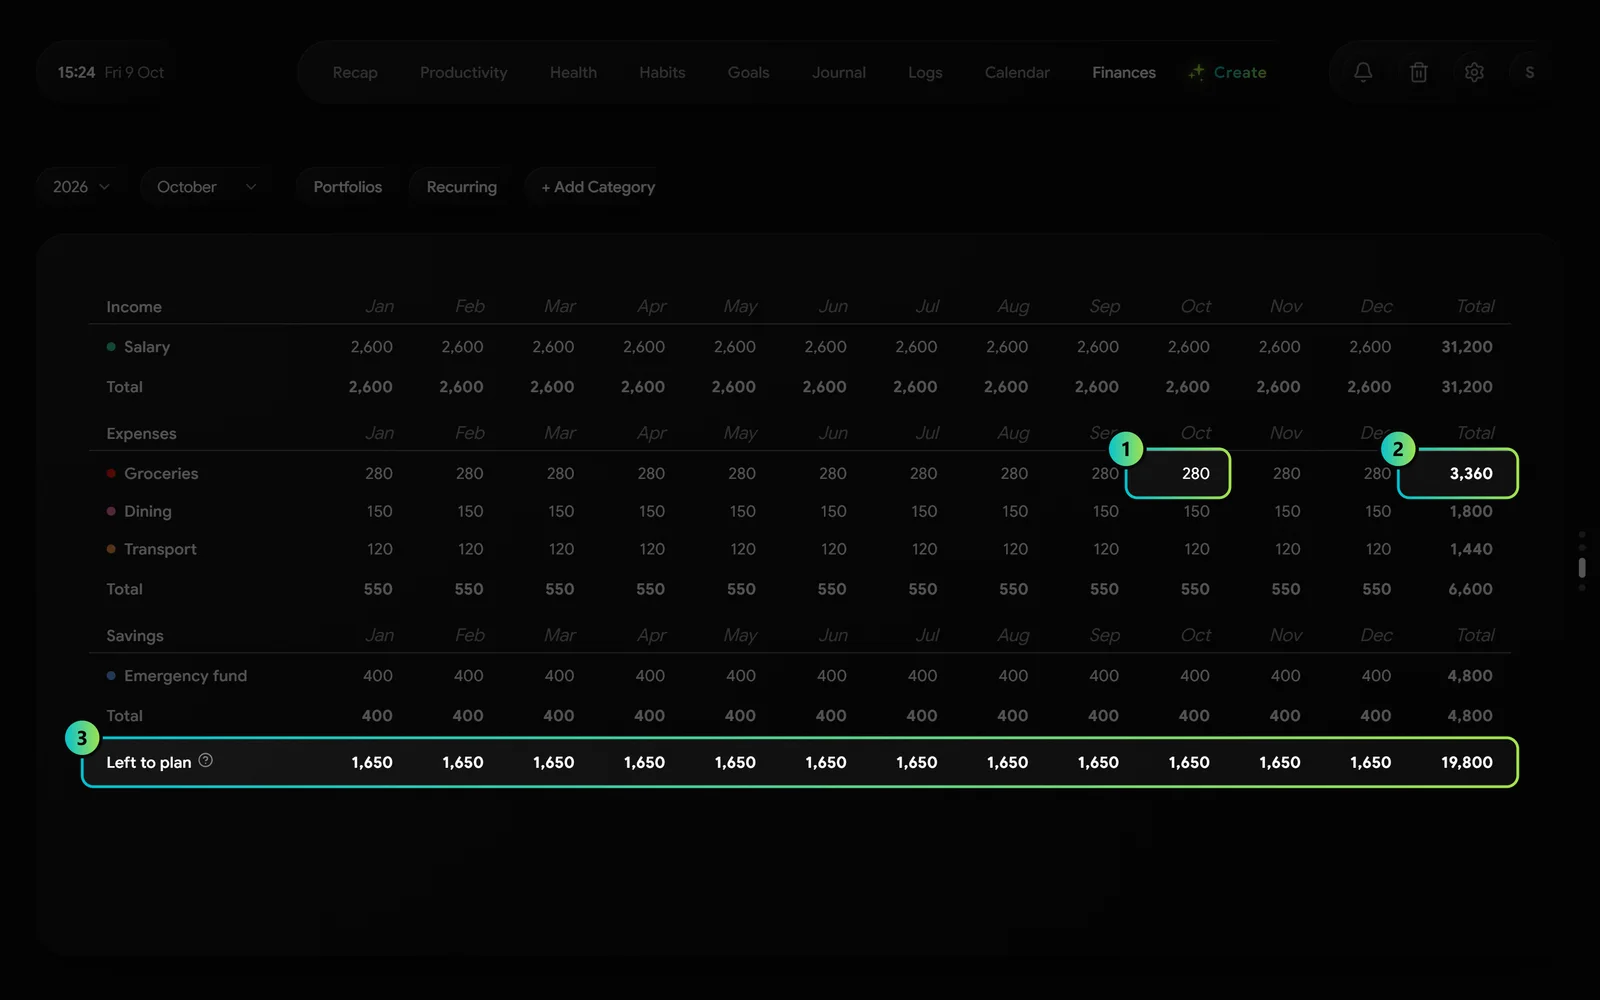
- A monthClick it, enter the planned amount, save. One cell per month, so a month that is different can be different.
- TotalYour year adds up here, for each category.
- Left to planYour income minus everything you have planned. Below zero means you have planned more than comes in.
Step 5 of 7
Add what repeats.
Rent, streaming, the gym: things you would otherwise type in every month. Open Recurring, click + Recurring, and add them once.
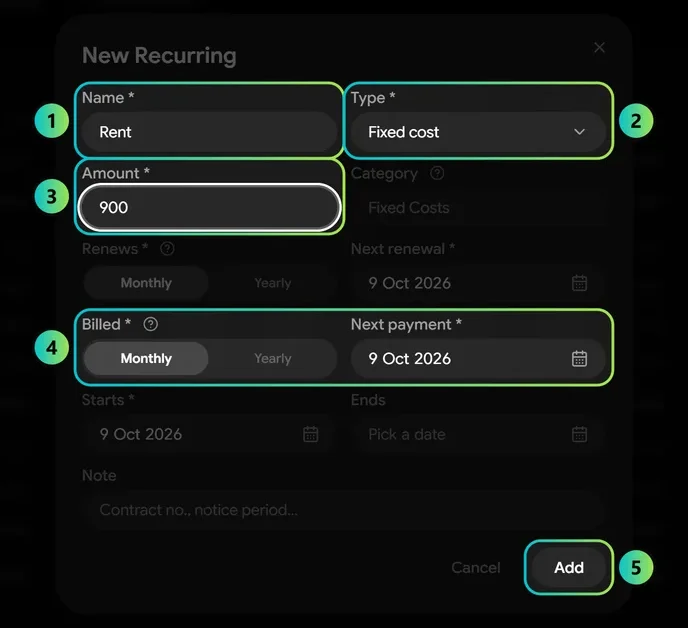
- NameWhat it is: Rent, Netflix, Salary.
- TypeFixed cost, Subscription, Income or Savings.
- AmountWhat it comes to each time.
- Billed and next paymentHow often the money goes out, and when it is next due. On that day PDA suggests the booking and waits for your OK. It never books on its own.
- AddSaved. Your fixed costs are now part of the plan, budget included.
Step 6 of 7
Book what you spend.
This is the part you will do most. Go to Transactions, the second dot, and click + Add Transaction.
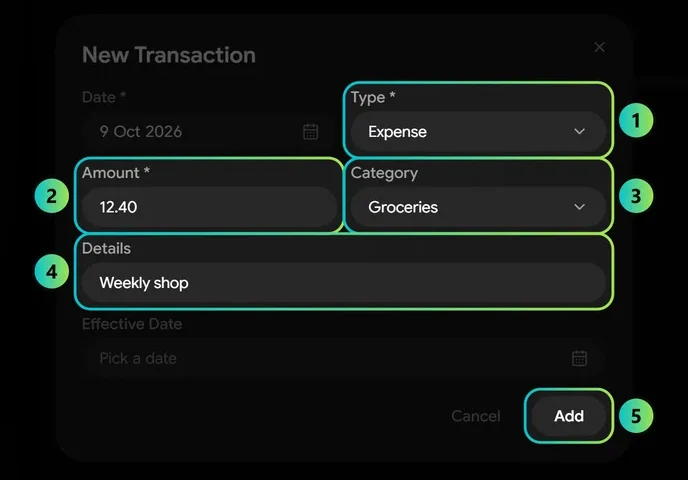
- TypeExpense, Income or Savings.
- AmountWhat you paid.
- CategoryWhich bucket it belongs to. This is what moves your budget.
- DetailsA note for future you: weekly shop, lunch with Sam.
- AddBooked. The date is today unless you change it.
Tip. Faster: click Create in the top bar and just say it, “12.40 on groceries”. PDA books it for you, and you can undo it.
Step 7 of 7
Your month at a glance.
This is what Finances looks like once it knows your plan. Come back to the Overview whenever you want to know where you stand.
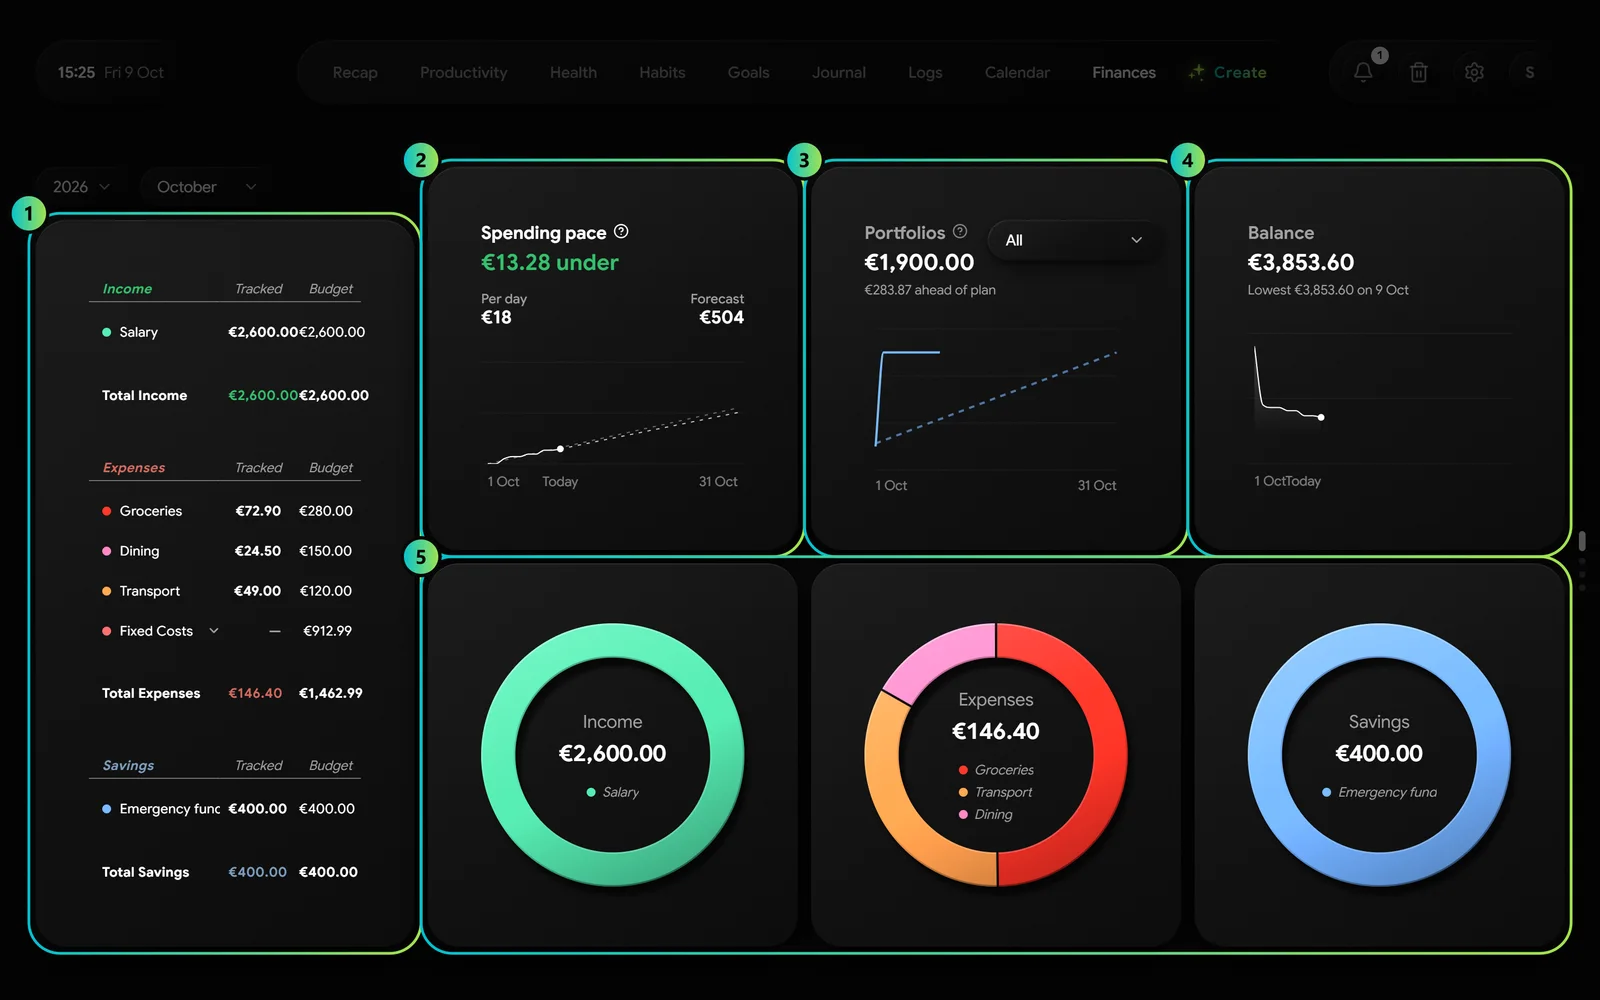
- Tracked against budgetFor each category, what you have spent so far next to what you planned.
- Spending paceWhether you are under or over plan today, and where the month is heading.
- PortfoliosYour savings, ahead of or behind plan.
- BalanceHow your balance moves through the month, and its lowest point.
- Income, expenses, savingsThe month split up by category.
That is it.
From here it takes a minute a day, or one sentence. Your plan stays, your month fills in, and the Overview tells you where you stand.
Start with today.
Free. No credit card needed.